Personal Siren Projects
Federal Thuderbolt 1003 From Pine Bluff, Arkansas
| Warning Sirens Main Page | Sherman, Thunderbolt 1003 | Arkansas, Thunderbolt 1003 | Fort Worth, Thunderbolt 1000 "Bar Grille" |
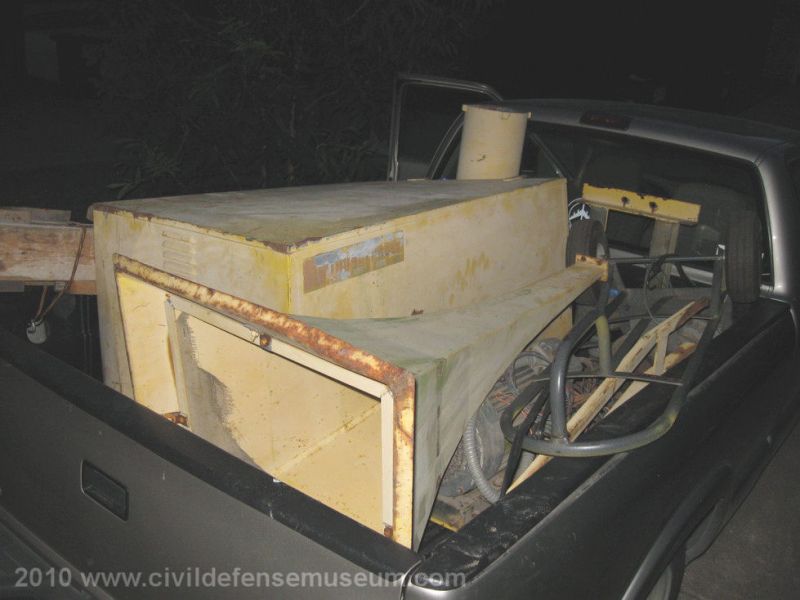
In 2010 I was contacted by a gentleman from Pine Bluff Arkansas who had a Thunderbolt 1003 siren. He was going to eventually restore it but never had the time. He offered it to me if I would come pick it up. I planned a two stop trip with the first stop in Shreveport Louisiana to stop by the Barksdale AFB air park and also to see the Roto Sphere at Shreveport Neon Signs. Next stop was Pine Bluff to pick up the 1003. It was a good trip overall with my S-10 completely overloaded on the return trip with a full Thunderbolt 1003 setup which consisted of the siren, blower and both control panels. See Above Photo.
I had the siren for a short time and did do the usual clean-up, greasing etc. (See Below) but after having it for several months along with the Sherman 1003 in the garage I realized it was just too much siren stuff (two full Thunderbolts) taking up room in the garage. I ended up passing the siren along to a father/son team out in West Texas (wish I could remember their names) who hopefully still have it.
I'm adding this page in 1/2018 primarily just to show some other details of the Thunderbolt 1003 that aren't shown on my Sherman 1003 page.
Clean-Up And Rust Removal Etc. Photos
Click Thumbnails To See Larger
 Rusted Solenoid Housing The Chopper Cap/Stator Is Aluminum |
 Rusted Solenoid And Valve Hold-Open Springs |
 Solenoid Housing After Cleaning Thankfully Mainly Surface Rust |
 Solenoid Housing After Rusty Metal Primer |
 Solenoid And Air Valve Plate Attached |
 Solenoid After Cleaning Installed In Housing |
The above photos are pretty self-explanatory. I think the siren chopper/rotator must have sat on it's face for a long time on the ground with the horn removed because the chopper and solenoids had bad rust/oxidation all inside them. I originally thought the whole this was junk when I first saw the corrosion but, as usual, with a Thunderbolt everything worked after it was cleaned up. It's almost impossible to kill one of these things.
RCM3 Cabinet and Chopper
Click Photos To See Larger
 RCM3 Control Cabinet Operates The Hi-Lo Solenoids For 1003 Siren |
 5/6 Port Chopper and Armature In Fair Condition With Oxidation Of The Chopper |
Control Cabinets Hooked Up For First Test Of Chopper And Solenoids
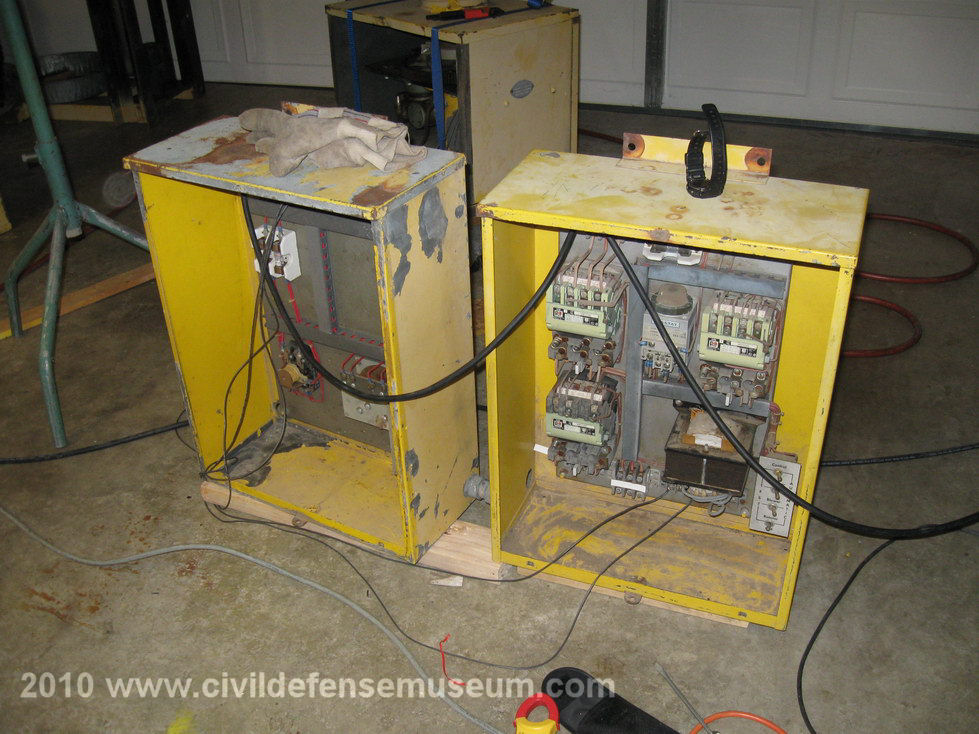
Here are the two RCM contorl cabinets (RCM3 on the left and RCM1 on the right) hooked up to run just the siren chopper and Hi-Lo solenoids. This RCM3 control cabinet has the original flasher unit to control the Hi-Lo solenoids. See a better view of the RCM3 cabinet above this photo. The flasher unit is the component on the lower right by the control switches.
The RCM1 cabinet in the control cabinet that operates the three motors that Thunderbolt siren uses. This cabinet has a contator for the blower motor, siren chopper motor and horn rotator motor. A full run-down of the RCM cabinet can be found in my Thunderbot Restoration Section.
Inside The 1003 Rotator Box
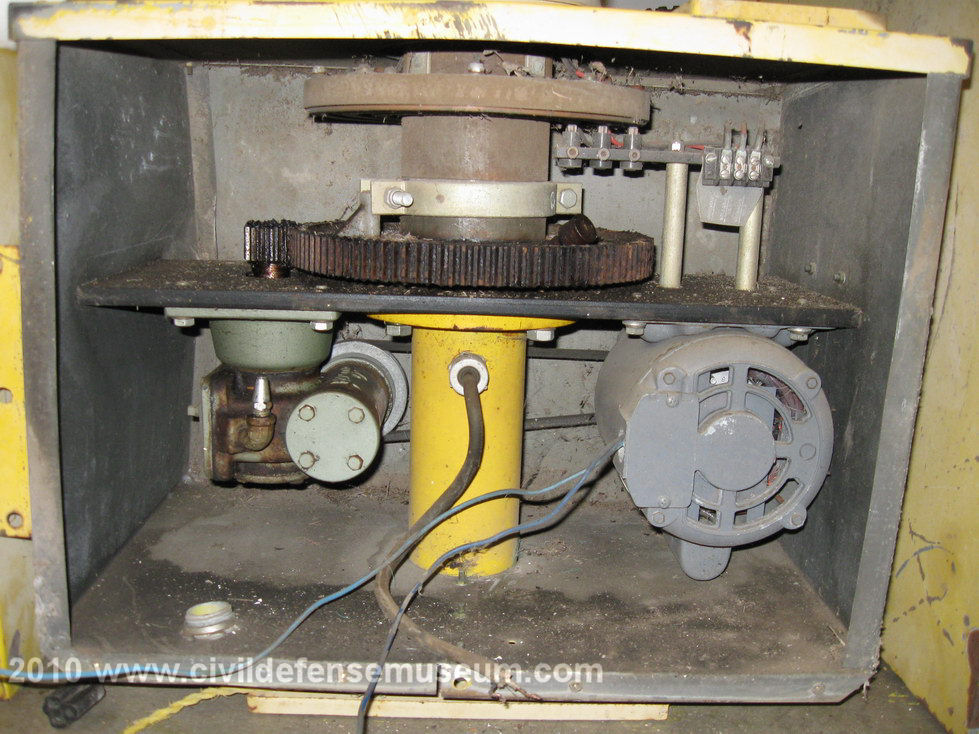
This is looking into the Thunderbolt 1003 rotator box. The rotator drive motor is the gray motor on the right and the rotator drive belt can be seen on each side of and behind the yellow chopper support tube. The light green mechanism on the left is the rotator gear reducer that reduces the speed of the motor drivin input to a slower output to the rotator drive gear. The drive gear is immediately above the gear reducer meshed with the big rotator driven gear on top of the metal mounting plate. On the gold colored supports above the rotator motor is mounted the Hi-Lo solenoid brush holders. The red wires to the brushes can just be seen behind the brush holders. The small terminal strip on the upper right is where the hook-ups to the Hi-Lo solenoids are. The plate at the top of the picture is the solenoid collector ring plate. The brushes ride against these rings to the current can be passed through the moving rotator unit up to the Hi-Lo solenoids in the solenoid housing.
Chopper Rotator Set Up To Test
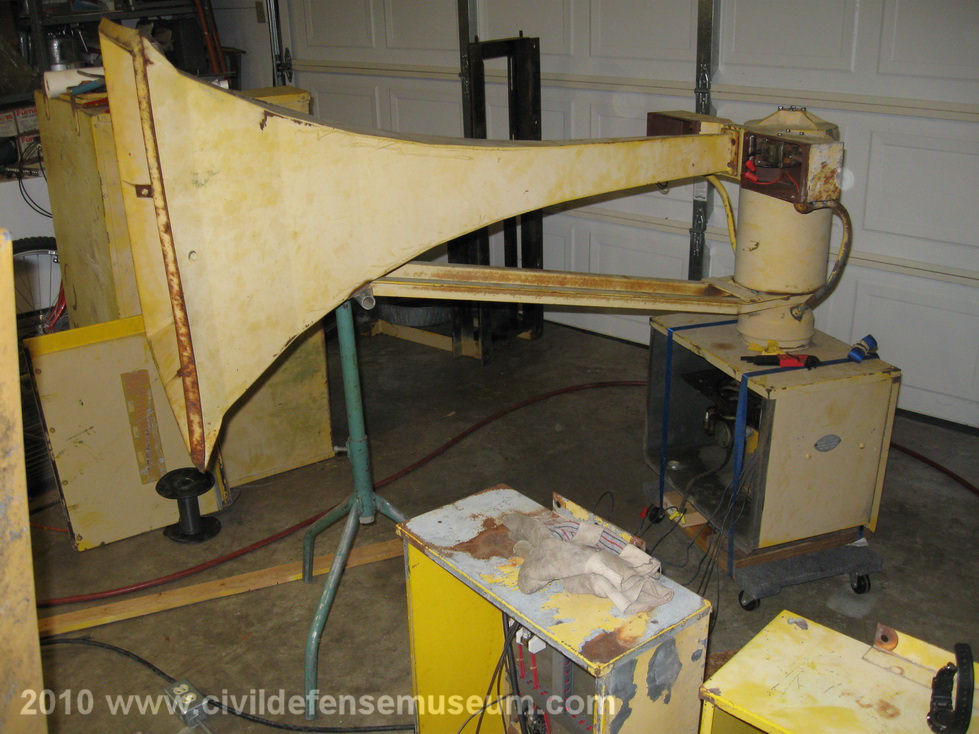
I never set this 1003 up into a full standing blower/rotator assembly since I didn't have it that long. The rotator was operational and everything worked but I never checked the operation of the blower motor. I'm sure it probably worked as well. The tops of the RCM cabinets can be seen at the lower right in the photo.
First Test Video Of The 1003 From Arkansas
This is the first time running this chopper and solenoids. I shot this video just after I took the photo seen above. This video shows the slow "wind up" of the original Federal Hi-Lo solenoid controller flasher. The flasher I made for the 1003 from Sherman doesn't have the wind-up like the original type flasher because they use differnt types of motors.